Showing posts with label DIY. Show all posts

Tuesday, October 11, 2011

Save A Penny: Painted Horizontal Striped Dropcloth Curtains


Before
Recently, I started working on redecorating my son's room. We live in a rental and the walls in his room were peach (3 walls) and a burnt orange color. Needless to say, I wasn't a fan and haven't done anything with his room since we moved in months ago.

I recently had some time in my schedule and received permission to repaint the room so I got to work. I painted the walls Dover White. It's so nice to have a clean slate to work on. If we owned the home, I might have done something a bit more daring than white but since it's a rental, I wanted it to be neutral.

I rearranged the furniture just a little and refinished a chair with some new paint and a new pad. I painted the chair blue and decided that the white curtains that I borrowed from my daughter's room didn't do enough with the white walls. I found a tutorial on painted curtains on Pinterest that I loved so I decided to give painted curtains a try. I absolutely love the end result. I still need to change up the bedspread but overall, I love his room so much more now than I did two weeks ago!

Here's how you can make your own painted curtains. 

Supplies:
2 drop cloths (or regular curtains if you'd prefer)
1 gallon of paint (I used nearly a quart on just ONE curtain)
A small foam roller and paint tray
Blue painters tape
Plastic to put under the drop cloth as you paint.


I purchased two drop clothes from Home Depot. I didn't have much of a choice because HD is all we have here but I've read if you want to use drop cloths, Home Depot is the place to go. Lowe's has them but many of them have a seam down the middle. I purchased two 6'x 9' canvas drop cloths for just over $10 apiece. 

1. Wash the drop cloths.
2. Iron them out. This takes some time since they are so large. I found that the highest setting was too hot for them. They needed a medium setting. I didn't use starch because I didn't want to have issues with the paint if I used starch.
3. Hem your cloth to the length you want. I have 8' ceilings and I wanted them to go from ceiling to floor so they are 94" long. I folded down the edge to 94" and then sewed the hem. 
4. Decide how many rows you want and how wide you want each row to be. I was planning on doing each line 6 1/4" but after I painted the first curtain and was measuring the second, I found that I had actually made the blue liens 6 1/2 and the white was 6 1/4. You can't tell but it made my last line on the bottom a little shorter as a result.
5. Carefully tape off each row that you will paint. The wider the tape, the more likely it will be that you won't mess up while painting. I used 1 1/2" tape because that's what I had on hand. I didn't make mistakes but if I were buying it, I'd purchase it a little wider just to be safe. I taped off one curtain, painted it and let it dry then tried taping off the other curtain. On the second curtain, I kept making mistakes while I taped so I finally laid the first, finished curtain underneath to help me as a guide. I'm SO GLAD I did this as the lines would have been totally off if I had taped them separately. I'd highly recommend lining them up together to make sure you tape them the same.
When taping your second curtain, line your first up underneath to make sure you tape it correctly!!


Tip: I wanted the top line white and both times I started taping I messed up and put the tape where the blue line would be painted. I had to peel it off and start over. Make sure you start off correctly with your tape after deciding if you want the top painted or white.

Because the tape has to stay only in the part that's staying white, it creates sort of an optical illusion with the lines.Your lines should LOOK wide and narrow if you want even lines.

6. Lay down your plastic and tape the edges. Lay your curtain on top and begin painting. I sat on a piece of brown paper that helped in case I accidentally stepped in paint or got it on my pants or something. I didn't want to worry about accidentally smudging paint onto the wrong area of the curtain.
7. Load that paint roller and start painting. The drop clothes absorb A LOT of paint so don't skimp. I got pretty good coverage but really should touch up the curtains because with the light shining through them, you can see some areas that need a bit more paint. The back of the curtain doesn't look nearly as pretty as the front. I'd recommend sewing a panel to the back if you want it to look pretty. You can also try to paint the lines on the back. However, I haven't tried this and I'm not sure that it wouldn't ruin the front if you did that so be cautious. 

8. Peel off the tape carefully. Don't allow it to touch down on the curtain! Allow to dry overnight and then the curtains are ready to hang!

All finished!!!


Monday, April 11, 2011

Simply Homemade: Reupholstered Dining Room Chairs

This is one of my favorite DIY projects to date. When Phil and I decided to purchase a new dining room table (pre-kids), we loved the table we purchased but weren't super excited about the white, yes, WHITE material that the chairs were covered with. We decided that we'd buy the chairs and someday, when the white was no longer that color, that we'd reupholster them.

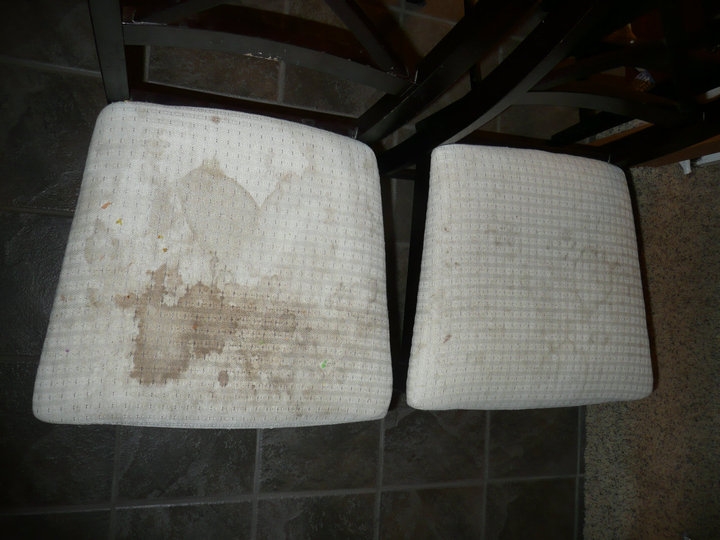
They stayed decently clean until Taeya came along. At first, we delegated her to one specific chair and also covered it with a dish towel to protect it. After a few months, she started moving around to different chairs for whatever reason or we'd have guests and she'd end up on a chair she didn't normally sit on. She also drank soy milk which she seemed to spill at nearly every meal. How does that happen? It always soaked through the towels and stained not only our chairs but her clothes as well. It wasn't long before our chairs looked like this:
Our original WHITE covered chairs at the end of their life

Yuck! We didn't even like sitting on them, even though we knew they were just stained. It was DEFINITELY time to recover our white dining room chairs and recover them we did.

It really wasn't a very difficult or time consuming process and the end result was dramatically different from what we started with. First, my husband and I stopped at Joann's going out of business sale and picked out a DARK fabric we both liked. I liked it A LOT but Phil finally caved and agreed to use it as well. He now likes it as well. I love that it's dark and has a print all over it because it makes any spills much harder to spot. While we were at Joann's, we also purchased some clear plastic to try out as well. More to come on that at the end of the post. We borrowed a staple gun and a compressor and would have finished this project in one evening except that we ran out of staples. So, it took us two evenings and probably a total of about 2-3 hours to recover all six chairs.
The material we chose

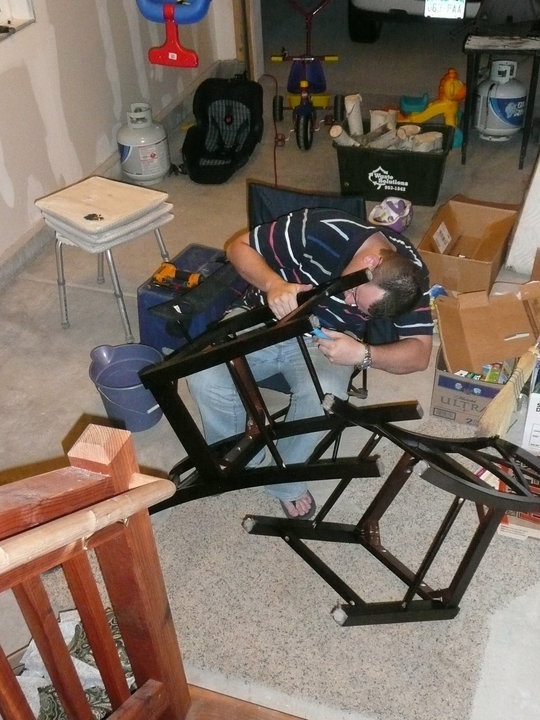
I first took the seat off of one chair and cut out six pieces of material with enough extra to wrap around the bottom edges of the chair. Phil and I then worked as a team to remove the rest of the seats and we recovered them together. It was much easier doing this with two people because one could make sure the material was straight and pulled tight while the other managed the staple gun. We stapled the new material right over the top of the old seat covers. The most time-consuming part of this project was screwing the seats back onto the chairs when we were finished.
Phil working on our chairs

Three of my beautiful newly covered chairs.

On our last two chairs, we used the clear plastic we purchased to cover the material to make child-proof dining room chairs for each of our kids. We figured we would cover just two chairs with the plastic (over top of our new material) to use with the kids and that we'd rip it off when they outgrew the messy stage. We didn't put the plastic on all six because we thought it would be somewhat uncomfortable to sit on. We found out that it's actually not uncomfortable, sticky etc. If we were to do it again, we'd recover ALL six of our chairs with the plastic protection.
Our plastic covered chair

Plastic covered chair on the right, regular material on the left

We love, love, love our new chair covers and although there have been a few spills on them, they still look amazing and I love that I can easily wipe off the two plastic covered chairs which we really try to have Taeya sit on when she eats. We now no longer dread sitting on our filthy dining room chairs and love how it's made our dining room look so much classier and cleaner.


Have you ever recovered something? Are your dining chairs in need of recovering? If so, give it a try! If you don't have access to a compressor and staple gun, you can purchase a hand held one that doesn't need a compressor at your local hardware store.

Monday, January 24, 2011

Simply Homemade: DIY Resolutions

In the beginning of January, I was reading Money Saving Mom and really liked the idea she had for New Year's Resolutions. She decided to try making one new thing each month that she hadn't made before to stretch herself and learn something new in the process. The link above will take you to her first project as well as her list of ideas.

I've been pondering doing the same thing but it took me the month of January to figure out what items I want to make. I have come up with one item for each month of the year but I am just going to make them whenever I have time, I won't necessarily assign each item to a specific month of the year. That way, if an item comes on sale or I have more time one month than another, I'll be able to take advantage of the sale or the free time to accomplish something on my list.

1. Name banner for Brecken's room using my friend's Cricut
2. Cloth Wallet to store receipts in
3. Sweet Pepper Jelly-from the Sure-jell box. Will only use 10 jalapenos and both red & green peppers as told to me by my friend, Stephanie, whose jelly I LOVE.
5. Make curtains for at least one room in the house we move to
6. Cake Pops
7. Make something from Ana White's Website
8. Wooden plaque for house
9. Homemade meatballs that my husband will like
10. Easy Crazy Crayon Party Favors
11. Peppermint Playdough
12. Make marshmallows

Would you like to join me in finding some new things to try this year? I found a couple great posts that have lists of some really excellent ideas to try. I haven't had time to look at most of the links individually but the ideas look fabulous!